Simple Steps: Create a Google Form for Registration & Collect Data Easily
Pembuka:
In today’s digital age, collecting information and managing registrations has become increasingly streamlined. Whether you’re organizing a community event in Brebes, a workshop for local artisans, or a school fundraiser, the need for an efficient registration system is paramount. Manual processes are often time-consuming and prone to errors. This is where Google Forms steps in as a user-friendly and cost-effective solution. This article will guide you through how to create a Google Form for registration, enabling you to gather data efficiently and effectively.
The beauty of Google Forms lies in its simplicity and versatility. It’s accessible to anyone with a Google account, making it a powerful tool for individuals, small businesses, and large organizations alike. Forget piles of paper forms and endless data entry; Google Forms allows you to collect data easily and analyze responses in real-time. Imagine Mrs. Aminah, a community leader in Brebes, using Google Forms to register participants for a local craft fair, saving her hours of manual work.
Many still rely on traditional methods or struggle with complex software. The good news is that mastering Google Forms is easier than you think. By following the simple steps outlined in this guide, you’ll be able to create registration forms that are tailored to your specific needs and capture the information you require. You’ll also discover tips for customizing your forms, sharing them effectively, and analyzing the data you collect. So, let’s dive in and unlock the power of Google Forms for your registration needs.
Isi Utama:
1. Setting Up Your Google Form: The Basics
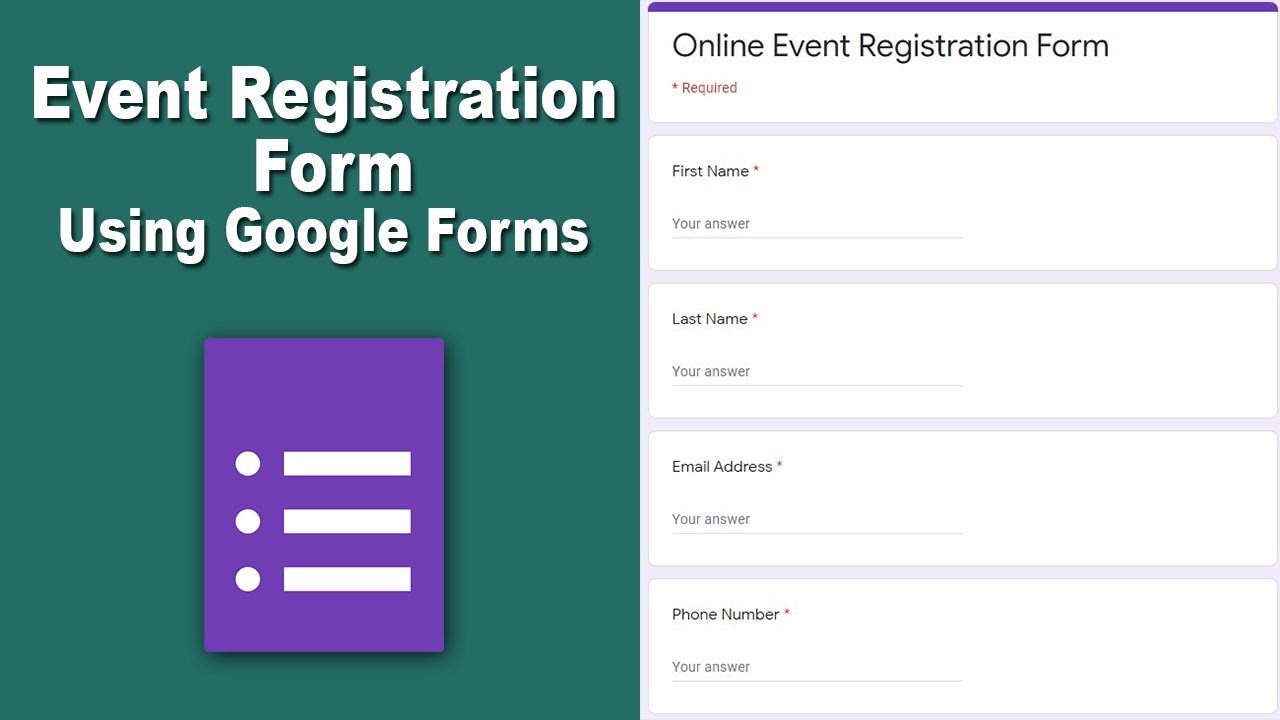
The first step in creating a Google Form is to access Google Drive. Simply log in to your Google account and navigate to Google Drive. Click on the "New" button, select "Google Forms," and choose either "Blank form" to start from scratch or "From a template" to use a pre-designed template. Starting with a blank form allows for maximum customization, while templates can save time and provide inspiration. For example, a school in Brebes might use a template for parent-teacher conference sign-ups.
Once you’ve created a new form, give it a descriptive title, such as "Workshop Registration" or "Event RSVP." Add a form description to provide context and instructions to respondents. This is where you can explain the purpose of the form, the information you’re collecting, and any important deadlines. As Pak Budi, a local teacher, says, "A clear description helps participants understand the form and provide accurate information."
Now it’s time to add your questions. Click on the "+" button to add a new question. Google Forms offers various question types, including short answer, paragraph, multiple choice, checkboxes, dropdown, linear scale, and date/time. Choose the question type that best suits the information you’re seeking. For example, you might use a short answer question for "Name," a multiple choice question for "Dietary Restrictions," and a date question for "Date of Birth."
2. Customizing Your Registration Form: Adding Relevant Fields
The key to an effective registration form is to ask the right questions. Think carefully about the information you need to collect from participants. Common fields include name, email address, phone number, address, age, occupation, and any specific requirements or preferences. Don’t overload the form with unnecessary questions; keep it concise and focused on the essential information. Remember, the longer the form, the lower the completion rate.
For example, if you’re organizing a workshop on batik making in Brebes, you might ask participants about their experience level with batik, their preferred batik patterns, and any allergies they may have to dyes. "Asking specific questions allows us to tailor the workshop to the needs of the participants," explains Ibu Ratna, a local batik artist.
Consider using conditional logic to show or hide questions based on previous answers. This allows you to create a more personalized and efficient experience for respondents. For instance, if someone answers "Yes" to the question "Do you have any dietary restrictions?", you can then show a follow-up question asking them to specify their restrictions. Conditional logic can be found under the three dots button on the bottom right of each question.
3. Enhancing User Experience: Design and Functionality
Google Forms offers several options for customizing the look and feel of your form. You can choose a theme color, upload a header image, and select a font style. A visually appealing form can enhance the user experience and encourage more people to complete it. Consider using your organization’s logo or a relevant image to reinforce your branding.
Go to the Customize theme button on the top right of the form to change the appearance.
To make your form more user-friendly, use clear and concise language. Avoid jargon and technical terms that participants may not understand. Use proper grammar and spelling, and proofread your form carefully before sharing it. As a general rule, keep your form as short and straightforward as possible.
You can also add a progress bar to your form to show respondents how far they are through the process. This can help to reduce abandonment rates, especially for longer forms. Go to settings and presentation to enable the progress bar.
4. Sharing Your Google Form: Reaching Your Target Audience
Once you’ve created and customized your registration form, it’s time to share it with your target audience. Google Forms provides several options for sharing your form, including:
- Email: You can send the form directly to email addresses.
- Link: You can generate a shareable link that you can post on your website, social media channels, or email signature.
- Embed: You can embed the form directly into your website or blog.
Choose the sharing method that best suits your needs and target audience. For example, if you’re promoting an event on Facebook, you might share the form link in a post. If you’re sending out a newsletter, you might embed the form directly into the email.
When sharing your form, be sure to include clear instructions and a compelling call to action. Let people know why they should register and what they can expect to gain from participating. A simple message like "Register now to secure your spot!" can be highly effective.
5. Analyzing Responses and Data Management: Leveraging Insights
Once you’ve started collecting responses, you can view and analyze the data in real-time within Google Forms. The "Responses" tab provides a summary of the responses, including charts and graphs that visualize the data. You can also view individual responses to get a more detailed understanding of each participant.
To export the data to a spreadsheet, click on the Google Sheets icon. This will create a new Google Sheet containing all the responses in a tabular format. You can then use Google Sheets’ powerful features to filter, sort, and analyze the data. This is particularly useful for identifying trends, patterns, and insights that can inform your planning and decision-making.
For example, if you’re analyzing registration data for a community workshop in Brebes, you might look for patterns in the age, occupation, and interests of the participants. This information can help you to tailor future workshops to better meet the needs of the community. "Analyzing the data helps us to understand what our community wants and needs," says Pak Eko, a community development worker.
Penutup:
Creating a Google Form for registration is a simple yet powerful way to streamline your data collection process and gather valuable insights. By following the steps outlined in this guide, you can create registration forms that are tailored to your specific needs and effectively capture the information you require. The benefits are numerous: improved efficiency, reduced errors, enhanced user experience, and valuable data analysis.
Whether you’re organizing a small community event or a large-scale conference, Google Forms can help you to manage registrations with ease. Remember, the key is to plan your form carefully, ask the right questions, and customize the design to create a user-friendly experience. And don’t forget to analyze the data you collect to gain valuable insights that can inform your future planning.
We all can start by using these tools in our daily lives, making tasks simpler and more organized. Hopefully, this guide will inspire other regions to embrace technology and simplify their administrative processes.
Kata Kunci Utama: Create a Google Form for Registration
Kata Kunci Turunan: Collect Data Easily, Create Registration Forms, Creating a Google Form
Related Keywords: Online form builder, registration form template, data collection tools


