How to protect an RDP server from brute force attacks? It’s a question every sysadmin wrestles with. These relentless automated attacks can cripple your network, leaving your data vulnerable. But fear not, digital warrior! This guide arms you with the knowledge and strategies to fortify your RDP server against these digital sieges, transforming your network from a vulnerable target into an impenetrable fortress. We’ll cover everything from beefing up your passwords to deploying advanced security measures, ensuring your RDP server remains a secure haven.
We’ll delve into the nitty-gritty of RDP vulnerabilities, exploring common attack vectors and how to neutralize them. Learn how to implement robust authentication, leverage network security best practices, and harden your server against intrusions. We’ll also explore advanced techniques like rate limiting and network access control, leaving no stone unturned in our quest for ultimate RDP security.
Understanding RDP Vulnerabilities and Brute-Force Attacks
Remote Desktop Protocol (RDP) is a powerful tool, but its inherent accessibility makes it a prime target for malicious actors. A poorly secured RDP server is like leaving your front door unlocked – an open invitation for trouble. Understanding how these attacks work is the first step towards securing your system.
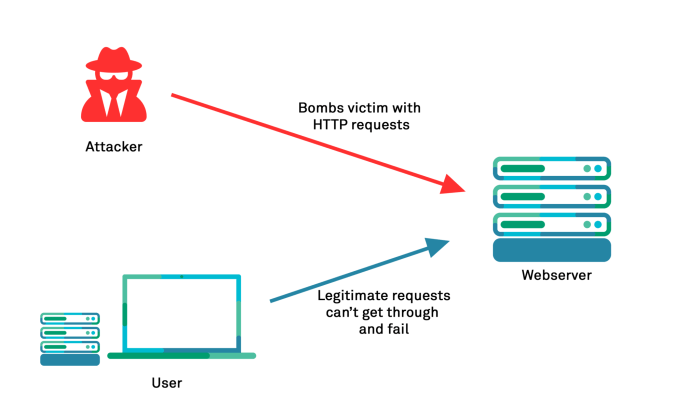
RDP brute-force attacks are essentially a trial-and-error method used to guess valid usernames and passwords. Attackers use automated tools to repeatedly submit combinations of credentials until they stumble upon the correct one, gaining unauthorized access to your server. This can lead to data breaches, system compromise, and significant financial losses.
RDP Vulnerabilities and Exploited Weaknesses
Brute-force attacks succeed because of several common vulnerabilities. Weak passwords, a lack of account lockout policies, and insufficient network security all contribute to the effectiveness of these attacks. The attacker doesn’t need sophisticated hacking skills; they just need time and the right tools. The longer the attacker has access to attempt logins, the greater the chance of success.
Typical Attack Vectors in RDP Brute-Force Attempts
Understanding how attackers launch these attacks is crucial for effective defense. Here’s a breakdown of common attack vectors, the vulnerabilities they exploit, and strategies to mitigate them:
| Attack Vector | Description | Vulnerability Exploited | Mitigation Strategy |
|---|---|---|---|
| Automated Scripting Tools | Attackers use scripts (e.g., Hydra, Ncrack) to automatically test numerous username/password combinations. | Weak passwords, lack of account lockout policies. | Implement strong password policies, enable account lockout after a certain number of failed login attempts, and use multi-factor authentication (MFA). |
| Dictionary Attacks | Attackers use lists of common passwords or words (dictionaries) to guess credentials. | Weak or easily guessable passwords. | Enforce strong password policies requiring a mix of uppercase and lowercase letters, numbers, and symbols. Regularly update password lists. |
| Network Scanning | Attackers scan networks to identify open RDP ports and vulnerable servers. | Open RDP port (3389) exposed to the internet without proper firewall protection. | Restrict RDP access to only trusted IP addresses through firewall rules. Consider using a VPN for remote access. |
| Exploiting Vulnerabilities in Older RDP Versions | Older RDP versions may contain security flaws that attackers can exploit to bypass authentication. | Outdated RDP software with known security vulnerabilities. | Keep your RDP server software and operating system updated with the latest security patches. |
Implementing Strong Authentication Measures
Protecting your RDP server from brute-force attacks isn’t just about firewalls and network security; it’s about controlling who gets in and how. A strong authentication strategy is your first line of defense, significantly reducing the risk of unauthorized access. Think of it like this: even the strongest fortress is vulnerable if the gate is unlocked.
Implementing robust authentication goes beyond simply setting a password. It’s about creating a multi-layered security approach that makes unauthorized access incredibly difficult. This involves carefully crafting password policies, diligently managing user accounts, and leveraging the power of multi-factor authentication.
Robust Password Policies for RDP Accounts
A strong password policy is the foundation of secure RDP access. Weak passwords are easily cracked, making brute-force attacks trivial. Your policy should mandate passwords that are long, complex, and frequently changed. A password of at least 12 characters, incorporating uppercase and lowercase letters, numbers, and symbols, is a good starting point. Furthermore, enforcing regular password changes – perhaps every 90 days – adds another layer of protection. Consider using a password manager to help users create and securely store complex passwords. Regular password audits can help identify and rectify weak or compromised credentials. Think of this as constantly upgrading the locks on your fortress.
Managing RDP User Accounts and Permissions
Beyond strong passwords, controlling who has access and what they can do is crucial. The principle of least privilege should be strictly enforced. This means granting only the necessary permissions to each user account. Avoid creating accounts with administrative privileges unless absolutely essential. Regularly review and audit user accounts, disabling or deleting those that are no longer needed. Account lockouts after a certain number of failed login attempts are also vital to thwart brute-force attacks. This is like carefully managing who holds the keys to your fortress, ensuring that only authorized personnel have access and that those keys are regularly checked and changed.
Multi-Factor Authentication (MFA) for RDP Access
Multi-factor authentication adds an extra layer of security by requiring users to provide multiple forms of verification before gaining access. While it adds a slight inconvenience to the login process, the enhanced security far outweighs the minor hassle. It’s like adding a second gate to your fortress, significantly increasing the difficulty for intruders.
- Time-Based One-Time Passwords (TOTP): These codes are generated by an authenticator app (like Google Authenticator or Authy) and change every 30 seconds. They provide strong security with minimal user overhead. A compromised password alone won’t grant access; the attacker also needs the current TOTP code.
- Security Keys (U2F): These physical devices, like USB security keys or NFC tags, generate unique cryptographic tokens that verify identity. They are highly resistant to phishing attacks and offer a robust security solution.
- SMS-Based Authentication: Receiving a one-time code via SMS to your registered mobile phone is a common method. However, it’s vulnerable to SIM swapping attacks, making it less secure than TOTP or security keys.
- Biometric Authentication: Using fingerprint or facial recognition can add an extra layer of security. However, the security depends on the robustness of the biometric system and its vulnerability to spoofing.
Network Security Best Practices for RDP: How To Protect An Rdp Server From Brute Force Attacks
Source: appcheck-ng.com
Securing your RDP server isn’t just about strong passwords; it’s about building a robust defense-in-depth strategy. Think of it like a castle – strong walls (network security) are just as crucial as a sturdy gate (authentication). This section dives into the network-level fortifications you need to protect your RDP server from unwanted access.
Network segmentation and firewalls are your first lines of defense, creating controlled access points that limit the impact of a successful breach. VPN implementation adds an extra layer of security, ensuring that even if someone gets past your initial defenses, their access is heavily encrypted and traceable.
Network Segmentation
Network segmentation involves dividing your network into smaller, isolated segments. This limits the blast radius of a security breach. If a hacker compromises a machine on one segment, they won’t automatically have access to your RDP server on a different, more secure segment. Imagine your network as a city divided into districts – each district has its own security measures, preventing a problem in one area from affecting the whole city. Implementing VLANs (Virtual LANs) is a common method for achieving network segmentation, allowing you to logically separate devices even if they are physically connected to the same switch. This isolation helps contain threats and prevents lateral movement within your network. By placing your RDP server on a separate, highly secured segment, you drastically reduce its exposure to potential attacks.
Firewall Configuration for RDP Access
Firewalls act as gatekeepers, controlling network traffic based on predefined rules. For RDP, you should configure your firewall to allow RDP connections only from specific IP addresses or networks that you explicitly trust. This prevents unauthorized external access attempts. For example, if you only need to access your RDP server from your home network and your office network, you would configure your firewall to only accept RDP connections originating from those specific IP address ranges. This dramatically reduces the attack surface, making brute-force attacks significantly harder, as the attacker would need to guess both the password and the source IP address. Regularly review and update your firewall rules to ensure they reflect your current access needs. Consider using a stateful firewall that tracks the connections and only allows return traffic for established sessions, preventing unauthorized inbound connections.
VPN Implementation for Secure Remote RDP Access
A Virtual Private Network (VPN) creates a secure, encrypted tunnel between your device and the RDP server. This ensures that even if your connection is intercepted, the data remains confidential. Think of it as a secure, private road for your data, protected from prying eyes.
Here’s a step-by-step guide to setting up a VPN for secure RDP access:
- Choose a VPN solution: Select a VPN server that meets your security and performance requirements. Options range from commercial services to self-hosted solutions.
- Configure the VPN server: Install and configure the VPN software on your server. This usually involves setting up user accounts and configuring network settings. Ensure strong encryption protocols (like OpenVPN with AES-256) are enabled.
- Configure the VPN client: Install and configure the VPN client software on your devices. This will allow you to connect to the VPN server.
- Connect to the VPN: Establish a VPN connection before attempting to connect to the RDP server. Once connected, all your RDP traffic will be encrypted through the VPN tunnel.
- Configure RDP access through the VPN: Ensure your firewall allows RDP traffic only from the VPN’s internal IP address range.
By implementing a VPN, you add a critical layer of security, encrypting all your RDP traffic and making it much more difficult for attackers to intercept your credentials, even if they manage to compromise your network’s perimeter.
Server-Side Hardening Techniques
Securing your RDP server isn’t just about strong passwords; it’s about a multi-layered defense. Think of it like a castle – you need strong walls (network security), a sturdy gate (authentication), and a well-guarded interior (server hardening). This section focuses on fortifying that interior, minimizing vulnerabilities within the server itself. By implementing these server-side hardening techniques, you significantly reduce the attack surface and make brute-force attempts far less effective.
Server-side hardening involves minimizing the potential entry points for attackers. This means streamlining what’s running on your server and ensuring only essential services are active. It also involves meticulously managing firewall rules and keeping your system updated with the latest security patches. Let’s dive into the specifics.
Disabling Unnecessary Services
Running unnecessary services on your RDP server is like leaving a back door unlocked. Each service represents a potential vulnerability, increasing the chances of a successful attack. A leaner server is a more secure server. Before disabling anything, however, thoroughly research the service’s function to ensure it’s not critical to the server’s operation or any applications relying on it. For example, if you’re not using the print spooler, disabling it removes a potential attack vector. The Server Manager in Windows provides a clear overview of running services, allowing you to easily identify and disable those not needed. Remember to reboot the server after making changes to ensure the modifications take effect.
Configuring Windows Firewall for RDP, How to protect an rdp server from brute force attacks
The Windows Firewall is your first line of defense against unauthorized access. By default, it allows RDP connections on port 3389, but this is far too broad. Restricting access to only specific IP addresses or networks drastically reduces the risk of brute-force attacks. Instead of opening port 3389 to the entire internet, configure the firewall to allow connections only from your trusted network or specific IP addresses of authorized users. This requires careful planning and management but provides a significant security boost. Incorrectly configuring the firewall can lock you out, so proceed with caution and test your changes thoroughly before deploying them to a production environment. Consider using a more robust firewall solution for advanced features like intrusion detection and prevention.
Regular Patching and Updates
Regularly patching and updating your RDP server’s operating system and software is crucial. Think of updates as armor upgrades for your castle. Microsoft regularly releases security patches addressing known vulnerabilities, including those exploited in brute-force attacks. Failing to apply these patches leaves your server exposed to known exploits. Implement a robust patch management system that automatically downloads and installs updates, but always test patches in a non-production environment first to minimize the risk of unexpected issues. Scheduling regular reboots for updates is also essential. Keep your antivirus software up-to-date as well; it’s an additional layer of protection against malware that could potentially compromise your server.
Monitoring and Intrusion Detection
Keeping tabs on your RDP server’s activity is crucial, not just for spotting brute-force attempts, but also for maintaining overall system health. Think of it as having a security guard constantly watching for suspicious behavior – proactive monitoring significantly reduces your vulnerability. Effective monitoring allows for swift response to threats, minimizing downtime and damage.
Effective monitoring involves a multi-layered approach, combining robust logging with intelligent analysis tools. By strategically implementing these measures, you build a comprehensive defense against malicious activity, allowing you to identify and respond to threats before they can escalate. This proactive approach is far more effective than reacting to a breach after the damage has been done.
RDP Server Log Configuration
Configuring detailed logging for your RDP server is the first line of defense. This involves enabling comprehensive logging within the Windows operating system itself. You should log all connection attempts, successful and failed, including timestamps, source IP addresses, usernames, and any error messages. This granular level of detail is essential for identifying patterns indicative of brute-force attacks. The more information you capture, the easier it will be to pinpoint suspicious activity. For example, a sudden spike in failed login attempts from a single IP address is a strong indicator of a brute-force attack in progress. This data can then be fed into your intrusion detection system for further analysis.
Intrusion Detection Systems (IDS) and Security Information and Event Management (SIEM)
IDS and SIEM tools provide automated analysis of your RDP server logs, looking for patterns consistent with malicious activity. An IDS acts as a network-based sensor, monitoring traffic for suspicious behavior, while a SIEM consolidates security logs from multiple sources, providing a centralized view of your security posture. These tools can be configured to trigger alerts when specific thresholds are exceeded, such as a large number of failed login attempts within a short time frame or unusual network activity originating from a specific IP address. For instance, a SIEM system could correlate a surge in failed RDP logins with other suspicious events, such as unusual file access attempts, providing a more complete picture of a potential attack. Using these tools proactively allows you to address threats before they can cause significant damage.
Key Metrics for Brute-Force Attack Detection
Regularly monitoring key metrics is essential for early detection of brute-force attempts. The following table Artikels some crucial metrics to track:
| Metric | Description |
|---|---|
| Failed Login Attempts | The number of unsuccessful login attempts within a specified timeframe (e.g., per hour, per day). A sudden and significant increase can indicate a brute-force attack. |
| Login Attempts from Single IP Address | The number of login attempts originating from a single IP address. A large number of attempts from a single IP address is highly suspicious. |
| Unusual Network Traffic | Unexpected or unusual network activity related to RDP connections, such as unusually high bandwidth consumption or connections from unexpected geographic locations. |
| Authentication Failures | Track the specific reasons for authentication failures. This can provide insights into the type of attack being used. |
| Connection Duration | Monitor the duration of RDP sessions. Extremely short or long sessions might indicate suspicious activity. |
Advanced Security Measures

Source: monovm.com
Beyond the foundational security practices, implementing advanced measures significantly bolsters your RDP server’s defenses against brute-force attacks and other sophisticated threats. These measures go beyond simple password policies and firewalls, offering a multi-layered approach to security. Think of it as adding a reinforced steel door to a house already protected by a sturdy lock and alarm system.
Network Access Control (NAC) provides granular control over which devices and users can access your RDP server. This prevents unauthorized devices from even attempting to connect, significantly reducing the attack surface. By combining NAC with other security measures, you create a robust defense system that significantly reduces the risk of unauthorized access.
Network Access Control (NAC) Implementation for RDP Access
NAC solutions verify the security posture of a device before granting it access to the network. This involves checking for things like up-to-date antivirus software, firewall configuration, and operating system patches. Only devices meeting pre-defined security criteria are allowed to connect to the RDP server. For example, a company might implement NAC to ensure all devices connecting to the server have a specific antivirus software installed and regularly updated. This prevents compromised machines from gaining access and potentially becoming launching pads for further attacks. Imagine a scenario where a laptop infected with malware tries to connect – NAC would immediately block it, preventing the malware from spreading to the RDP server.
Rate Limiting to Mitigate Brute-Force Attacks
Rate limiting restricts the number of connection attempts from a single IP address within a specific timeframe. This is crucial because brute-force attacks rely on numerous trial-and-error login attempts. By implementing rate limiting, you can effectively throttle these attacks, preventing them from overwhelming your server. For instance, you could configure your firewall or RDP server to allow only a maximum of 5 login attempts per IP address within a 5-minute window. Any IP address exceeding this limit would be temporarily blocked, effectively stopping the brute-force attack. This is a relatively simple but highly effective method.
IP Address Restrictions to Limit RDP Access
Restricting RDP access to only specific IP addresses or subnets is a straightforward yet highly effective security measure. This limits the potential entry points for attackers, drastically reducing the risk of brute-force attacks. Instead of allowing connections from any IP address, you only permit access from your trusted internal network or specific IP addresses of authorized users. For example, if only employees within your office need RDP access, you can configure your firewall to only allow connections from your office’s IP address range. This prevents external attackers from even attempting to connect to the RDP server. It’s a fundamental layer of defense that significantly simplifies your security posture.
Regular Security Audits and Assessments

Source: appcheck-ng.com
Regular security audits are the unsung heroes of RDP server protection. They’re not just a box-ticking exercise; they’re a proactive way to identify vulnerabilities before attackers do, minimizing your risk of a brute-force attack and other security breaches. Think of them as a comprehensive health check for your server, ensuring it’s robust and resilient. Consistent auditing allows for early detection and remediation of weaknesses, preventing them from escalating into major security incidents.
Regular audits provide a clear picture of your server’s security posture, highlighting areas needing attention and confirming the effectiveness of existing security measures. This ongoing assessment allows for continuous improvement, making your RDP server a tougher nut to crack for malicious actors.
RDP Server Security Audit Checklist
A structured approach is crucial for effective audits. This checklist provides a framework to guide your assessments, ensuring no stone is left unturned. Remember to tailor this checklist to your specific environment and risk profile.
- Account Management: Verify the existence of unnecessary or inactive accounts. Check for accounts with overly permissive permissions. Review password complexity policies and their enforcement.
- Network Configuration: Assess the firewall rules to ensure only authorized connections are permitted. Verify that RDP is only accessible from trusted networks or via a VPN. Review network segmentation and isolation strategies.
- Software Updates: Check for and install all critical operating system and RDP updates. Ensure all software components are up-to-date and patched against known vulnerabilities.
- Security Logs: Review server logs for suspicious activity, including failed login attempts, unusual network traffic, and unauthorized access attempts. Ensure logs are properly configured and rotated.
- Access Control: Review and document the access control lists (ACLs) for all RDP-related resources. Verify that the principle of least privilege is being enforced.
- Auditing Settings: Confirm that sufficient auditing is enabled to track all relevant security events. Ensure that audit logs are securely stored and regularly reviewed.
Vulnerability Scanning and Penetration Testing
Vulnerability scanning and penetration testing are complementary techniques that provide a comprehensive security assessment. Vulnerability scanning automatically identifies potential weaknesses in your server’s configuration and software. Penetration testing, on the other hand, simulates real-world attacks to assess the effectiveness of your security controls. Together, they offer a layered defense, providing a more complete picture of your security posture than either technique alone. Think of vulnerability scanning as a preliminary health check, while penetration testing is a more thorough examination by a specialized medical team.
For example, a vulnerability scan might identify an outdated version of RDP, while a penetration test might attempt to exploit that vulnerability to gain unauthorized access. The combination allows for both automated detection and hands-on validation of security controls.
Responding to and Recovering from a Brute-Force Attack
Even with robust security measures, a successful brute-force attack is always a possibility. A well-defined incident response plan is crucial for minimizing damage and restoring your server to a secure state. This involves immediate actions to contain the attack, followed by a thorough investigation and remediation process.
A typical response involves immediately blocking the offending IP addresses, resetting compromised passwords, and reviewing server logs for indicators of compromise. A post-incident review should analyze the attack, identify weaknesses in your security controls, and implement corrective measures to prevent future incidents. Consider this scenario: a successful brute-force attack leads to unauthorized access. The immediate response is to block the attacker’s IP, reset affected accounts, and change RDP port settings. Following this, a thorough investigation determines the attacker exploited a weak password policy. The remediation involves implementing a stronger password policy, enabling multi-factor authentication, and enhancing security logging.
Final Thoughts
Securing your RDP server against brute-force attacks isn’t just about ticking boxes; it’s about building a layered defense that anticipates and adapts to evolving threats. By combining strong authentication, robust network security, server-side hardening, and vigilant monitoring, you create a system that’s far more resilient than the sum of its parts. Remember, consistent vigilance and proactive security measures are your best weapons in the ongoing battle against cyber threats. Stay ahead of the curve, and keep your data safe!


